Table of Contents
Event-Durations as Margin Markers
The goal is to display a little border on a round watch face to mark the duration of the next 3 events.
This technique is used in my Agenda Watch Face.
This page describes the basic technique only for the margin visualization only. You can of course combine it with other agenda features like actually displaying the events.
Before you start, you should create three events today's calendar, otherwise you won't see anything in watchmaker.
Circle Segments
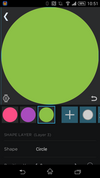
 For each of the 3 next potential events we will create one circle shape with the following properties:
| Position X | 0 |
|---|---|
| Position Y | 0 |
| Width | 512 |
| Height | 512 |
Also pick a different color for each of them.
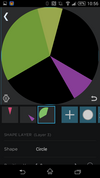
 Then add a Segment Between to each of them using the following properties:
| Degrees Start | {c1br} |
|---|---|
| Degrees End | {c1er} |
| % opacity in range | 80 |
| %opactiy outside range | 0 |
Of course adjust the number in {c1br} and {c1er} for each of the segments.
You should now have three circle wedges marking the time of the next three events on a twelve hour clock. Some of them may overlap, but thanks to the lowered opacity of 80 it should be obvious where that happens. We'll adjust this later.
Inner Circle
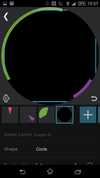
 Now add another circle, slightly smaller than your full watch face:
| Position X | 0 |
|---|---|
| Position Y | 0 |
| Width | 480 |
| Height | 480 |
This will cover most of the wedges above, keeping only a small border left. This circle is your base for the rest of the watch face. Of course you could also use an image or any of the Watch Backgrounds.
Current time
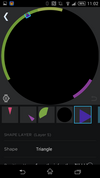
 You could simply add a watch hand to show the current time. But let's make it a bit more fancy. We'll use a small triangle to indicate the current time.
Add a triangle shape and set the following properties:
| Position X | math.sin(math.rad({drh})) * 245 |
|---|---|
| Position Y | math.cos(math.rad({drh})) * -245 |
| Width | 25 |
| Height | 25 |
| Rotation | {drh} |
This will rotate a 25×25 triangle 245px around the center based on the current time.
Show or No-Show?
Since events are marked on a 12h circle but can happen within a 24h range some clever mechanism for deciding if an event can be shown or not is needed. Here are the rules:
- Only events beginning in the next 12 hours or already running shall be shown
- if it's 8am do not show an event for 9pm
- if it's 10am do show an event that starts at 8pm and goes an hour
- Upcoming afternoon events may not clash with ongoing morning events
- if it's 9am do not show an event that starts at 8pm and goes two hours
To do so we'll use the following tags.
| Tag | Description |
|---|---|
| {drh} | Rotation value for hour (12h, adj for mins) |
| {dtp} | Time (% 24 hours) |
| {c1bp} | Event 1 Begin % 24 Hours |
| {c1br} | Event 1 Begin Rotation (12 hours) |
| {c1er} | Event 1 End Rotation (12 hours) |
| {c2bp} | Event 2 Begin % 24 Hours |
| {c2br} | Event 2 Begin Rotation (12 hours) |
| {c2er} | Event 2 End Rotation (12 hours) |
| {c3bp} | Event 3 Begin % 24 Hours |
| {c3br} | Event 3 Begin Rotation (12 hours) |
| {c3er} | Event 3 End Rotation (12 hours) |
If an element is shown or not can be influenced through it's opacity. Since we're using a shader we have to modify the shader's opacity. In our case we want to dynamically set the % opacity in range property. It should be either 0 (don't show) or 80 (show nearly opaque).
First Segment
- opacity in range
({c1bp} < 0.5 or {dtp} >= 0.5 or {c1er} < {drh}) and 80 or 0
Show this if one of the following is true:
- The first event starts in the morning
- It is now afternoon
- The first event ends before now on a 12h clock
Second Segment
- opacity in range
({c2bp} < 0.5 or {c1bp} >= 0.5 or ({c2er} <= {c1br} and {c2er} < {drh})) and 80 or 0
Show this if one of the following is true:
- the second event starts in the morning
- the first event start in the afternoon (then this one will, too)
- the second event ends before the first event and before now on a 12h clock
Third Segment
- opacity in range
({c3bp} < 0.5 or {c1bp} >= 0.5 or ({c3er} <= {c1br} and {c3er} < {drh})) and 80 or 0
Show this if one of the following is true:
- the third event starts in the morning
- the first event start in the afternoon (then this one will, too)
- the third event ends before the first event and before now on a 12h clock